Power of Inkscape - One of the Best Free Software tool for Photo Editing
- One of the best free software tool for photo editing and creation is Inkscape.
- This is easier than working with the tools of Adobe photoshop and cost of inkscape is $0.
- You can download and install the software using Ubuntu software centre.
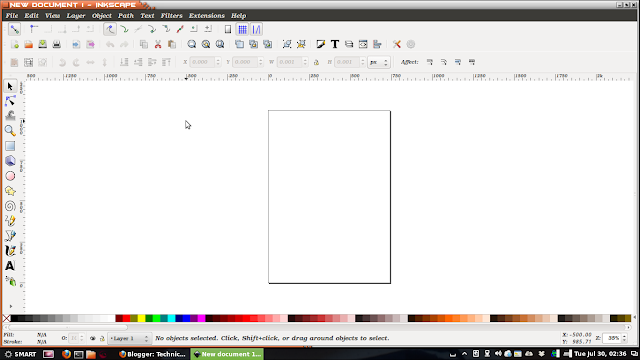
- The interface of inkscape is as shown:
- The properties of the page can be changed using "file->Document properties or (shift+ctrl+D)."
- This option is used for page format and its properties, the user can set according to their requirement.
- Using this properties the height and width can be suitably set and adjusted.
- Different tools used in this software is shown below:
- All the tools are cool and easy to implement.
Q) How to create an effective posters and banners?
To answer the above question let us consider an example, image shown below is made using inkscape:
To do an effective poster the major requirements are
To answer the above question let us consider an example, image shown below is made using inkscape:
To do an effective poster the major requirements are
- Attractive Fonts
- Awesome Backgrounds
- High Quality Images and Logos
- Systematic and structural Placing of above elements
Special effects in poster can be created using following tools: go to "objects-> fill and Stroke"
There are many different options that can be achieved using this option, they are:
Let us design the above poster
step1: Put the background to the Rectangle field.
step2: Adjust the Opacity and Blur % of the background.
step3: Put the logos and select the required fonts to be used in the poster.
- opacity% : To increase and decrease the backgrounds,
- blur: Name itself suggest the functionality,
- fill: To change the colour and add effects to the image
Let us design the above poster
step1: Put the background to the Rectangle field.
step2: Adjust the Opacity and Blur % of the background.
step3: Put the logos and select the required fonts to be used in the poster.
- The main thing to be noticed is each and every images, text, logo, and background is taken as frames. In the above case there are 5 frames.
- The freedom of this software is the user can select any frame using Left click without any difficulty unlike any other software.
step5: Adding Stroke to the text is shown below using "object->Fill and Stroke" and user is free to select any type of colour present and inkscape provides 5 different flat colours that is RGB, HSL, CMYK, Wheel & CMS.
step6: Adding the images (basically the images are from internet) to the poster and adding relative title.
-> The Kannada font and text is achieved using google Kannada convertor online is copy and paste.
step7: The basic stuff is ready but the actual task starts to give additional effects.
- copy the "DRUPAL" text and paste it there itself but just change the opacity % and position of text behind the original text.
-> Similarly, copy the "ANDROID" text, using mouse revert the text and add the stroke effect called "Radial gradient" to the text.
step8: Finally add the other additional text to required field to the poster. And finally we get the image shown below.
The main work is that user should be able to place the frames in proper manner for getting the complete job satisfication.
Sample examples of inkscape posters
Not only this go to link:
All the posters and banners which is available there are all made using inkscape.
That it!!!
That it!!!
Any query in using inkscape just add a comment and i will be happy to help.


Well written Yashwanth
ReplyDeleteThank You Karthik
ReplyDelete